Elevate Your Exterior
Transform Your Outdoors with West Hills Masonry!
Call our Professional Contractors!
(714) 519-5009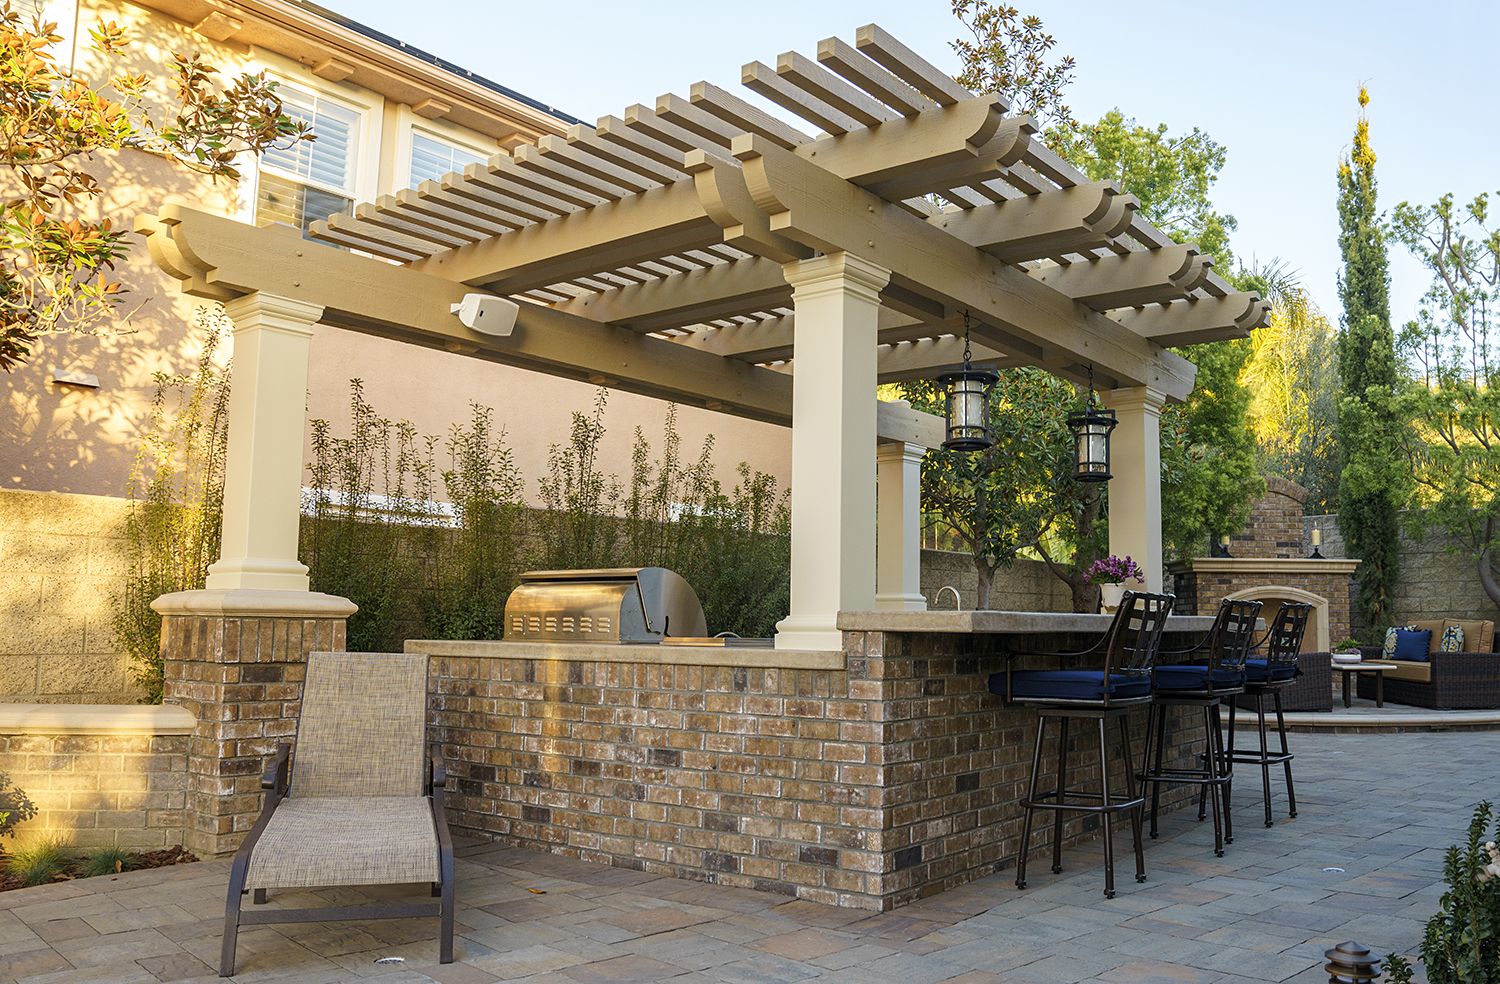
A pergola is a versatile outdoor structure that not only enhances your living space but also provides a robust framework for climbing plantsClimbing plants are plants that grow vertically, often using structures like trellises, walls, or fe..., adding both beauty and shade to your garden. Building your own pergola can be a deeply rewarding DIY project. Not only does it allow you to tailor a space to your aesthetic preferences, but it can also increase the value of your property. To build a pergola, plan its design and location, gather materials like wood, screws, and tools, then construct the foundation, attach beams and crossbeams, and apply finishes like paint or stain for protection.
This DIY guide for beginners provides comprehensive pergola plans and step-by-step instructions to plan, construct, and maintain a pergola, empowering you to enhance your home’s exterior with your own hands.
Determining the size and design of your pergola involves selecting the right pergola plans that complement your home and fit the dimensions of your outdoor space.
The location of your pergola largely depends on how you intend to use it. Consider the path of sunlight throughout the day, existing garden layouts, and how the pergola will blend with the surrounding environment. A well-placed pergola can provide shade during the hottest parts of the day or frame a beautiful view of your garden.
The size of your pergola should complement the scale of your outdoor area and the style of your home. Consider both the height and the footprint. Would a classic rectangular structure suit your space, or would a square configuration be better? Check local building codes for any restrictions or permits needed before you begin.
You'll need to prepare a list of materials based on the size and style of your pergola. Common materials include posts (usually 4x4 or 6x6), beams, rafters, and crossbeams. You’ll also need hardware like screws, nails, and possibly metal brackets for reinforcing the structure. Choose materials that will withstand your local climate conditions, such as treated wood or even metals like aluminum.
For a standard pergola, materials typically include:
The tools required for a pergola project are relatively straightforward. You will need:
Before you begin construction, it's essential to dig post holes to the right depth and width to ensure your pergola's stability and compliance with local building codes. Typically, holes should be about 24 inches deep, or below the frost line in colder regions, to prevent shifting during freeze-thaw cycles. The width should generally be about 9 inches to accommodate the post size plus some room for adjustments.
After digging the holes, add about 6-8 inches of gravel to the bottom. This layer helps with drainage, preventing water from pooling around the posts, which can lead to wood rot and instability.
Proper spacing between posts is crucial not only for the pergola’s structural integrity but also for maintaining the desired aesthetic. Space your posts according to the overall dimensions of the pergola, ensuring they're aligned both vertically and horizontally. Use stakes and strings to mark and measure the distances accurately before setting the posts.
To ensure your pergola stands the test of time and elements, consider staining or painting it. Begin by cleaning and sanding the pergola to ensure the surface is smooth and free from old paint or dirt. Apply a high-quality exterior primer suited for the material of your pergola, followed by your chosen color of exterior paint. For staining, use a brush or sprayer to apply an even coat and consider a second coat for deeper color and additional protection. Always allow ample drying time as recommended by the product manufacturer.
Transform your pergola into a cozy retreat by adding comfortable seating options, such as cushioned chairs or a swing. Incorporate outdoor lighting like string lights or lanterns to create a warm ambiance. Adding curtains or drapes can provide additional shade and privacy, while decorative elements like rugs and throw pillows can enhance the overall aesthetics and comfort of your outdoor space.
Maintaining your pergola is crucial for its longevity. Regularly inspect the structure for any signs of wear or damage such as peeling paint or rot. Clean the pergola periodically with a power washerA power washer, also known as a pressure washer, is a machine that uses high-pressure water to clean... or by hand with a mild soap solution to remove dirt and debris. Reapply stain or sealant every two to three years, or as needed, to protect the wood from moisture and UV damage. Also, check and tighten any loose fasteners and replace damaged components as necessary to keep the pergola sturdy and safe.
Pressure-treated wood, cedar, and vinyl are popular choices due to their durability and aesthetic appeal. The choice depends on your budget, climate, and personal style preferences.
This can vary by location. It's essential to check with your local building authority to determine if a permit is needed for a pergola in your area.
The time can vary based on the complexity of the design and your skill level, but typically, a basic pergola can be built over a weekend.
Yes, you can attach a pergola to your house, but it requires ensuring that the house’s structure can support it. It’s advisable to consult with a professional to ensure safety and compliance with building codes.
Wooden pergolas should be inspected annually and might need re-staining or sealing every two to three years. For minimal maintenance, consider materials like vinyl or aluminum.
Adding string lights, climbing plants, or sheer curtains can enhance the aesthetic appeal. For functionality, consider incorporating outdoor furniture, fire pits, or a dining area.
Building a pergola is more than just a weekend project; it's an investment in your home’s comfort and curb appeal. By following this guide, you not only gain a stunning outdoor feature but also the satisfaction of crafting something beautiful with your own hands. Regular maintenance and creative personal touches will keep your pergola inviting and stylish year after year. For those looking for more structured guidance, consider using detailed pergola plans from professionals like those at West Hills Masonry.
Ready to transform your outdoor space with a professional touch? Visit West Hills Masonry for expert advice and top-notch installation services. Whether you're dreaming of a classic wood pergola or a modern aluminum structure, West Hills Masonry can bring your vision to life. Contact us today to start your project!
 Carlos Gonzales
Locations We Serve
Schedule A Consultation