Key Takeaways
- Ensure the patio cover fits perfectly by measuring your outdoor space accurately.
- Obtain necessary permits and ensure your design complies with local building codes.
- Select materials like woodWood is a natural, organic material derived from trees, commonly used in landscaping and constructio..., metal, or fabric based on durability, maintenance needs, and aesthetics.
- Consider using DIY kits like Alumawood for easier installation, which include all necessary components and detailed instructions.
- For complex designs or to ensure structural safety, hiring a professional is advisable to ensure the patio cover is built safely and up to code.
A backyard patio cover enhances your outdoor living space by providing protection from the elements and increases its usability throughout the year. Whether it shields from the sun's rays or gives you a dry space during a downpour, a covered patio makes your outdoor area more versatile and enjoyable. To design and build your own backyard patio cover, measure and plan the space, select materials that suit your climate and style, secure necessary permits, and construct the foundation, frame, and roof structure following local building guidelines.
This comprehensive guide will walk you through the steps from planning and preparation to construction and maintenance, ensuring you create a sturdy and stylish extension of your home.
Planning Your Patio Cover
Determining The Size And Location
- Considering the size of your patio space: It's important to measure your existing patio or desired space accurately. This ensures that the patio cover fits well and meets your needs without overwhelming your space.
- Choosing the best location for your cover: Optimal placement is crucial. Consider the path of the sun throughout the day and any natural shade from your surroundings. Position your patio cover to provide the desired amount of sunlight or shade, enhancing your comfort and the usability of the space.
Selecting The Design And Materials
Researching Different Styles Of Patio Covers
Exploring various styles of patio coversPatio covers are structures built over patios to provide shade, protection from the elements, and en... is essential to find the best match for your needs and preferences. Each style not only impacts the aesthetics of your home’s exterior but also offers different levels of functionality.
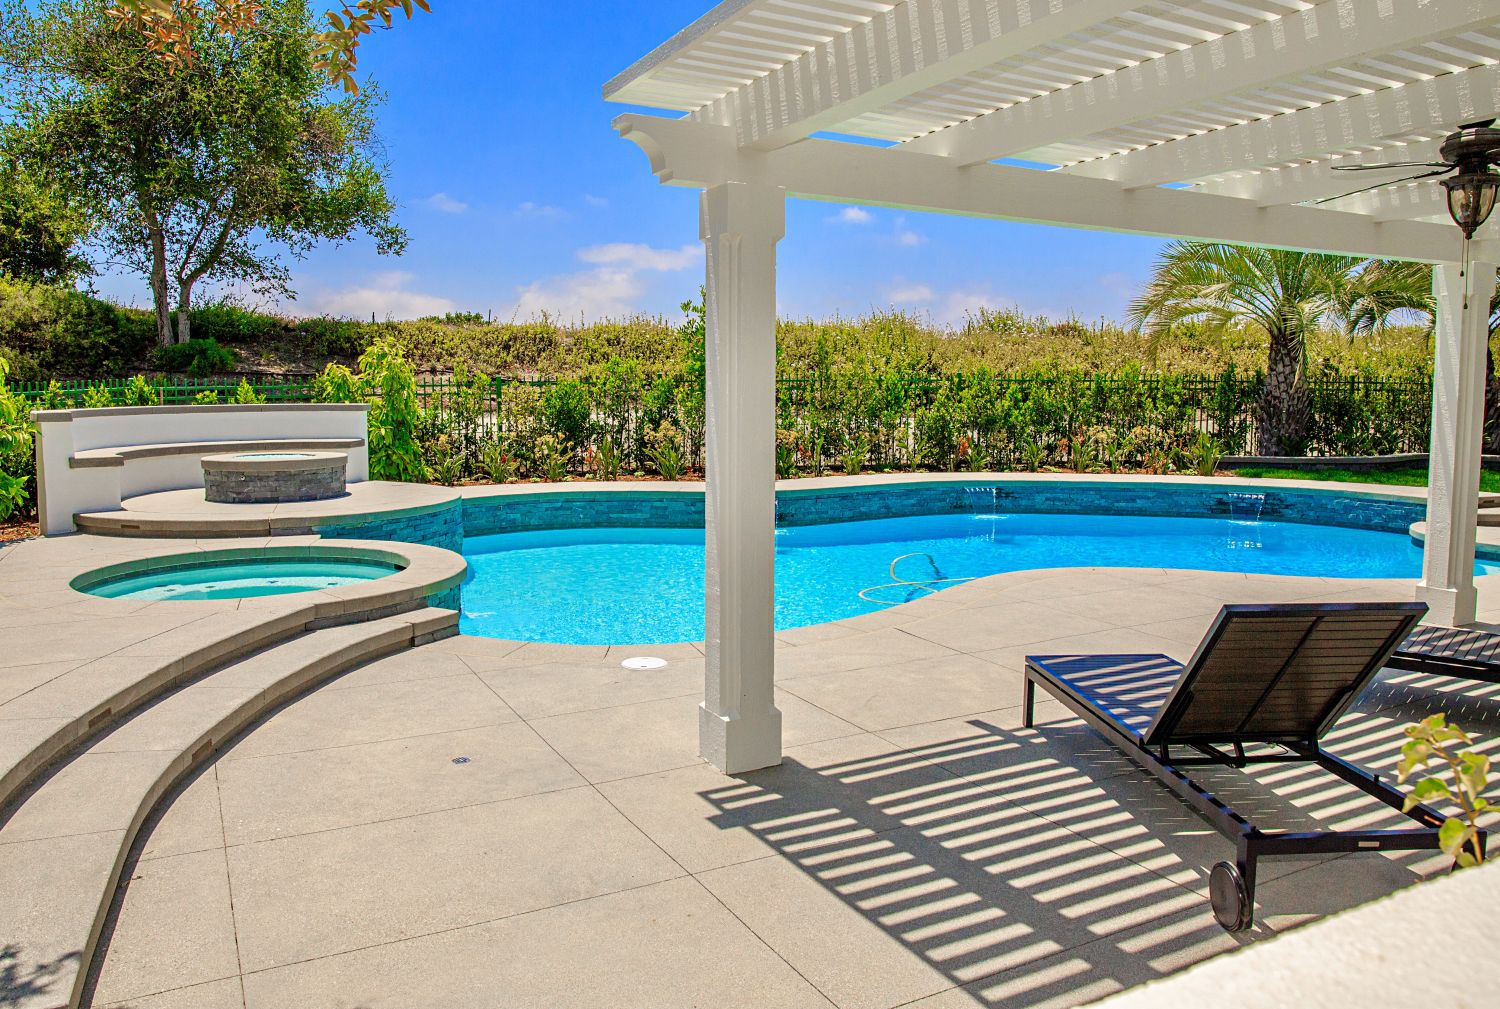
- Pergolas:
- Visual Appeal: Known for their lattice roof, pergolas provide a structured, yet open feel that is perfect for garden settings.
- Shade LevelA level is a tool used to determine whether a surface is horizontal (level) or vertical (plumb). It ...: Offers partial shade, ideal for those who prefer some sunlight.
- Awnings:
- Flexibility: Great for areas where temporary shade is needed. Retractable awnings are especially useful as they can be extended or retracted depending on the weather.
- Utility: Provides excellent protection from sun and light rain.
- Solid Roofs:
- Protection: Best for maximum shade and protection from the elements.
- Durability: Typically more durable, these can be constructed from materials like metal or tiles.
- Retractable Awnings:
- Versatile Shade Options: Offer flexibility on sunny days, allowing you to enjoy both sun and shade as needed.
- Freestanding Patio Covers:
- Placement Flexibility: Ideal for covering areas away from the main house structure, such as garden or pool areas.
- Design Independence: Allows for creative design choices independent of the home's existing architecture.
- Patio Pergola:
- A patio pergola is another attractive option that offers partial shade and is perfect for climbing plantsClimbing plants are plants that grow vertically, often using structures like trellises, walls, or fe....
Choosing Between Wood, Metal, Or Fabric Materials
Each material has its pros and cons. Wood offers a natural look but requires maintenance, metal is durable and offers a modern appeal, and fabrics are versatile but may need replacement over time due to wear and tear from the elements.
Preparing Your Space
Checking Local Building Codes And Permits
- Understanding any regulations regarding patio covers in your area: It's essential to check with your local building authorities to ensure your project complies with all building codes and zoning laws. This may include specific rules about the structure’s size, height, and location on your property.
Gathering Tools And Materials
- Making a list of necessary supplies for construction: You will need basic tools like a tape measure, level, circular saw, drill, screwdrivers, hammer, and ladder. For materials, depending on your chosen style and design, gather suitable lumber, roofing materials, and fasteners. Safety gear such as gloves and goggles are also essential to ensure a safe building process.
Choosing the right patio flooring ensures durability and complements your new patio cover.
Building The Roof Structure
Installing The Ledger Board
To begin constructing your patio cover roof, start by attaching a ledger board to your house. This serves as the main support for the patio cover. Here's a simplified guide to installing the ledger board:
- Mark and Prepare: Measure the desired location on your house for the ledger board. Ensure it aligns with your design, and then cut the board to the required length. Treat the board with a weatherproofing product to protect against moisture damage.
- Attach the Board: First, locate the studs on your house for a solid attachment. Level the ledger board at the marked location, drill pilot holes to prevent wood from splitting, and attach it using corrosion-resistant screws. Ensure the board is stable and adjust as necessary to eliminate any wobbling.
- WaterproofingWaterproofing is the process of applying a protective barrier to surfaces, such as walls, foundation...: After attaching the ledger board, it’s important to install a flashing to prevent water damage. This acts as a barrier between the ledger board and your house, directing water away from the structure.
Setting Up Posts And Beams
Once your ledger board is securely in place, you can proceed to set up the posts and beams that will support your patio cover:
- Install Center Posts or Beams: Position and secure the posts or beams at appropriate distances along the patio cover area. These should be installed vertically and secured in concreteConcrete is a composite material made from a mixture of cement, sand, gravel, and water. It is one o... for stability.
- Ensure Structural Integrity: Check that all posts and beams are aligned and leveled. They should support the weight of the roof securely and evenly.
Adding Rafters and Roofing
With the posts and beams set, the next step is to add rafters and the roofing material of your choice:
- Attach Rafters: Space the rafters evenly across the top of the beams and secure them in place. Make sure they are aligned correctly for a uniform look and structural stability.
- Choose Roofing Materials: Select a roofing material that complements the style of your home and meets your needs for durability and maintenance. Attach the roofing material to the rafters, ensuring it is secure and properly aligned.
Final Touches And Maintenance
Adding decorative touches to your patio cover personalizes your space and enhances the overall appeal.
- Finishing and Weatherproofing: Add the finishing touches to your patio cover by painting, sealing, or adding decorative elements to enhance its appearance. It's also important to apply a weatherproof sealant to protect the structure from the elements.
- Maintenance Tips: Regularly inspect your patio cover for any signs of wear or damage. Look for loose screws, signs of wood rot, or any shifts in the structure. Promptly address these issues to maintain the safety and beauty of your patio cover.
DIY Kits And Professional Help
Using DIY Kits
DIY patio cover kits, such as those offered by Alumawood, provide a convenient and cost-effective solution for homeowners looking to add a patio cover without the need for professional installation. These kits typically come with all necessary components, including rafters, beams, posts, and often a variety of customization options like color choices and decorative elements.
Alumawood kits are particularly popular due to their durability and ease of assembly. They are designed to mimic the look and feel of natural wood but are made from aluminum, which offers added durability and requires less maintenance. Unlike wood, Alumawood does not rot, warp, or require regular painting or sealing.
Pros Of Alumawood DIY Kits
- Low Maintenance: Aluminum doesn't require the ongoing maintenance that wood does, such as painting or sealing .
- Longevity: Alumawood covers are known for their durability and can last many years without the need for replacement .
- Weather Resistance: These covers are designed to withstand various weather conditions, making them suitable for many climates .
Cons Of Alumawood DIY Kits:
- Noise: Aluminum can be noisier than wood, especially during rainstorms, as it can amplify the sound of raindrops.
- Cost: While generally more cost-effective than custom installations, upfront costs for high-quality aluminum kits can be higher than other materials.
When To Hire A Professional
While DIY kits offer many advantages, there are situations where hiring a professional might be the better choice. Professionals ensure that the installation meets all local building codes and regulations, which is crucial for safety and compliance. Additionally, professional installers can handle more complex designs and configurations that might be challenging for a DIY approach.
Hiring a professional is advisable if:
- Complex Designs: If your desired patio cover involves complex features or customization beyond the scope of standard kits.
- Building Codes: Professionals can navigate local building codes and permit requirements, ensuring that your patio cover is built legally and safely.
- Structural Safety: Professionals ensure that the structure is safely anchored and capable of withstanding local environmental conditions like wind and snow loads.
Frequently Asked Questions
What are the best materials for a patio cover?
Wood, metal, and fabric are popular choices, each offering different benefits like durability and aesthetic appeal. Metal, particularly aluminum, is durable and low maintenance, while wood offers a natural look but requires more upkeep.
Do I need a permit to build a patio cover?
Yes, most localities require a permit for outdoor structures. Check with your local building authority to ensure compliance with all regulations and obtain the necessary permits.
How do I ensure my patio cover is weather-resistant?
Use materials suited for your climate, ensure proper installation, and apply protective sealants. For metal structures like Alumawood, additional powder coatings can enhance weather resistance.
Can I install a patio cover on any type of house?
Yes, patio covers can be adapted to most house types. However, the way to attach it may vary based on your home's exterior. So, it's best to consult a professional for complex installations.
How long does it take to build a patio cover?
The duration can vary from a single weekend for basic DIY kits to several weeks for custom designs. Preparation, size, and complexity of the design are major factors.
What maintenance is required for a patio cover?
Regular inspections are key. They are for damage, cleaning, and reapplying sealants or paint as needed. This is especially true for wood covers. Metal and fabric covers generally require less maintenance.
Design And Build Your Own Backyard Patio Cover With West Hills Masonry
Constructing a backyard patio cover is an enriching endeavor that not only amplifies the charm and functionality of your outdoor space but also boosts your property's value. Select patio furniture that complements your new cover and enhances comfort and style. With expert advice from West Hills Masonry, you can ensure your covered patio space is built with precision and superior craftsmanship. Their extensive experience in bespoke masonry ensures that every project meets the highest standards of quality and design.
Transform your outdoor living space with a stunning, durable patio cover designed by the experts at West Hills Masonry. Contact us today to schedule a consultation and take the first step towards your dream patio project.
 Carlos Gonzales